
And if anyone feels the need to remind me that I did run screaming into the night a few times, recall that at least I remembered my address and took my keys with me.
Materials:
A reasonable amount of plain muslin.
Pale colored thread.
A Sharpie!
Yarn for hair. We used a very silly, fluffy fun-fur type.
A sewing machine.
Some loverly pink organza.
Different loverly pink ribbons, 2 inches wide, cut about 15 inches long.
Jewels.
Googley eyes.
Non-permanent markers for the kids.
Tacky Glue. Small bottles the kids can manage.
Skinny ribbons, cut about 10 inches long.
Tiny bunches of pink roses on floral wire. We found 10 in a bunch for just a few dollars. Just cut apart the bunch and remove the floral tape and they'll be useable individually.
Making the Doll
1. Draw a template. The doll should be about 10-12 inches high, with a nice big
round head, and fairly thin, long arms and legs. Give yourself enough room to
turn and stuff the doll, but we don't want a fat baby ballerina here, we want a
nice long stringy ballerina. Our arms and legs were about an inch, an inch and a
half wide. It's nice to add a thumb sticking up and shape the foot so there's a
shoe.
2. Trace the template onto muslin with your Sharpie. It's good to sew one up and make sure you like it before you trace 20 of them.
3. Cut the dolls apart from each other. Don't worry about cutting too close to the sewing line -- just separate the dolls from each other. It's easier to sew if you have more room.
4. Set your sewing machine to a very small stitch length and sew around on the
Sharpie line. Leave a small hole for turning under one arm. About an inch and a
half will work.
5. Now trim the excess fabric down to very very close to the stitching line. Clip your curves, turn, and stuff
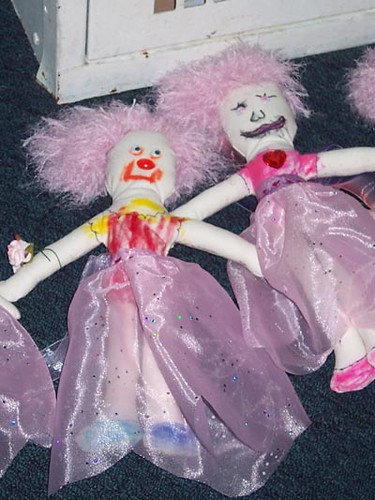
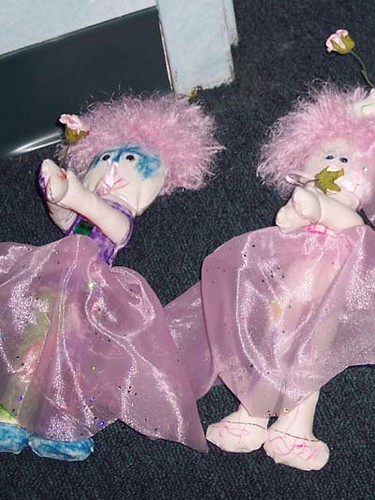
6. Finally, use a Sharpie to draw a leotard and shoes onto the doll. Do different necklines, different sleeve shapes and hems, etc, on the different dolls. Make the leotard one of those ones with legs that go halfway down to your knees.
Making the Hair
1. Make yourself a cardboard hair-winder. If you want short hair, the
cardboard hair-winder should be about 4 inches wide. For longer hair, go up to 6
inches.
2. Wind the hair around the hair-winder until you have a reasonable amount
of hair for a doll.
3. Slide the loop of hair off the cardboard and lay it on a scrap of
muslin. The more interesting and delightful your yarn is, the more irritating
and painful it will be to make the hair. Soft slippery fluffy hair is going to
give you a pain in your bum that feels like the bite of a horse.
4. Sew it down to the muslin, making sure that it doesn't spread out more
than a few inches. As you go down the hair, keep smooshing it under the pressure
foot, smooshing, and smooshing. The stitches you're sewing will separate the
bangs from the rest of the hair, so if you're making long hair, put your
stitches toward one end.
5. Turn the muslin-and-yarn wig over and trim the muslin down very close to
the stitching line.
6. Lay the wig on the doll and sew it on by hand. While you're doing your
handwork, you can stitch up the hole in the doll that you used to turn her and
stuff her. If you have any "gotcher armpit" jokes in you, now is the time to use
them.
7. Turn the doll upside down over a garbage can and clip open the loops of
hair. You're over a garbage can to stop the fluffs of hair from invading every
corner of your home. For this reason, take your scissors with you and go
outside, before you give her a good shake and then a nice haircut/trim to shape
up her hairdo.
8. After doing this hair, it's a good idea to clean out your sewing machine
a bit.
Making the Skirt
1. To make 21 skirts, I folded 1 yard of organza into thirds (12 inches
wide, 44 inches high) and cut the thirds into 7 pieces each (approximately
12 inches wide, 6 inches high). You could make them wider (more that 12 inches)
for more gather, or longer (more than 6 inches) if you have a longer doll.
2. Increase your stitch length all the way long and stitch down the top of
each skirt. Pull on the bobbin thread and gather the skirt up.
3. Cut your wide ribbon into pieces approximately 15 inches long. Fold the
center of the ribbon over the center of the skirt and sew into place so the
ribbon is wrapped over the gathered up part. I used a decorative stitch for this
-- hearts, flowers, you know the drill.
4. Now the skirt is done. If you're making more you can fancy it up with a
hem, or stitch the entire ribbon closed, or something, but if you're making a
lot, and you finish this part, give yourself a pat on the back and maybe a nice
big mug of rum. Or diet Coke.
Putting it All Together.
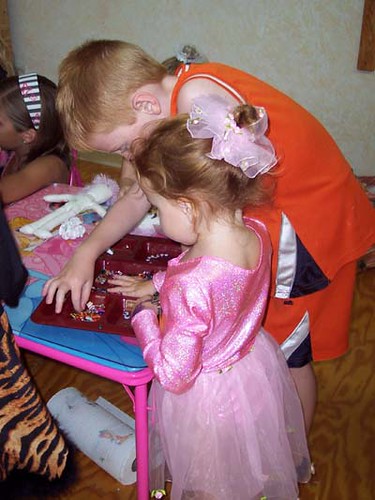
Now it's the kids' turn to take over. There are two ways to put this project together. I suggest the kit method for a smaller number of kids, the station method for a larger number.
The Kit Method
Into your large ziploc baggie goes 1 doll, 1 skirt, 2 googley eyes, a
handful of jewels, a skinny ribbon, and a rose. The child sits down at a table
with a communal marker bin.
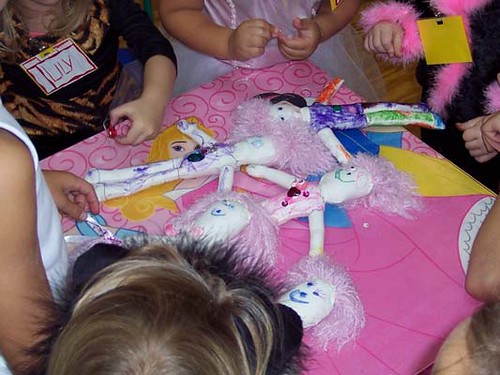
1. First, she colors the face and leotard using markers. Non-permanent
markers are fine, because we're not going to be throwing this doll in the
washing machine, are we?
2. Next, she glues jewels onto the doll's body. Maybe emeralds around the
neckline. Maybe a giant sparkly heart right in the middle of the bodice.
Maybe diamonds in the hairline. A pearl on each shoe. Try not to glue
anything right around the waist where the skirt will tie on. Show the kids how
to do one dot of glue for each jewel, rather than splodging around a whole lot
of glue.
3. Tie on the skirt. Older children will be able to manage sticking jewels
onto the skirt too, but it's tricky, because the glue bleeds through the
organza.
4. Now tie the skinny ribbon around her neck in a bow, and clasp her hands
together and wrap the little rose around them, using the wire. If the child
doesn't want the hands clasped, you can just wrap the rose around one hand, like
a wrist corsage.
5. Allow glue under jewels to totally dry before the doll begins her career
as a toy.
The Station Method
1. The Marker Station. Give each child just the doll and have her sit down
at a table with a communal marker bin and color the leotard, shoes, and
face.
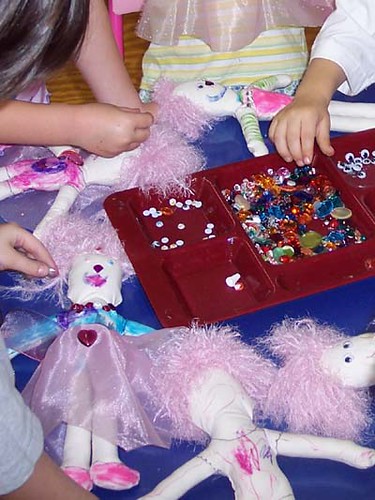
2. The Sparkle Station. Put the jewels and googley eyes out in trays and
have an adult (or two or three) standing by to administer the glue as directed
by each child who comes to the station. You do the glue, the kid arranges the
jewels, the eyes, as they desire.
3. The Skirt Station. Pick out a skirt and tie it on the doll.
4. The Finishing Station. Tie the skinny ribbon around her neck and wrap a
flower around her wrist.
Done! Let the pretending begin!
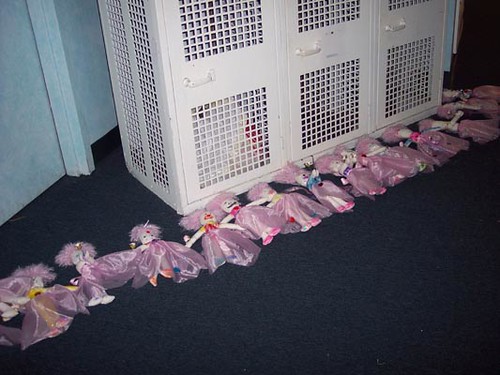
Thank you to Ahno who fought with that lousy muslin and that slippery pink hair, on and on into the night, and emerged triumphant. We prepped these projects for 20 children at ballet camp, and thanks to the cooperation of the teachers and volunteers, we had 20 happy children bouncing off with their own personal doll at the end of the day.
What cute ideas! I have a Princess Camp for my daughter and her friends, and am on the lookout for ideas. This is somewhat complicated, though it will give me inspiration! Thanks!
ReplyDelete