
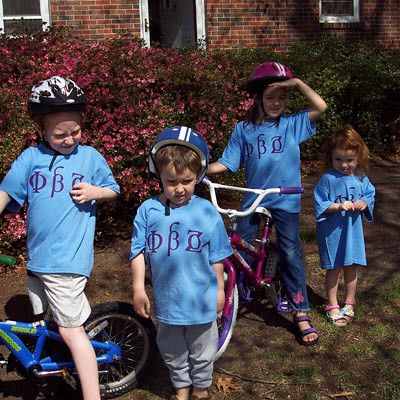
I made six t-shirts for our small homeschool co-op with this method, and it worked great. I let Benny pick the color of the paint and Sadie pick the color of the shirt, but apart from that they weren't able to help too much because of the razors involved. Hey, you can't always make it a teaching moment. Especially when there are razors.
Supplies list:
T-shirts
Acrylic, permanent, unwashable paint
Paintbrush
Freezer Paper
Masking Tape
X-Acto knife
Iron and ironing board
Piece of cardboard as big as design
1. Make your design.
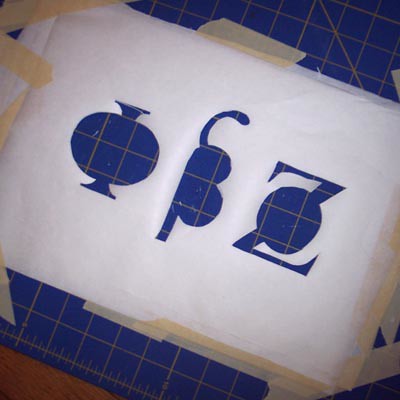
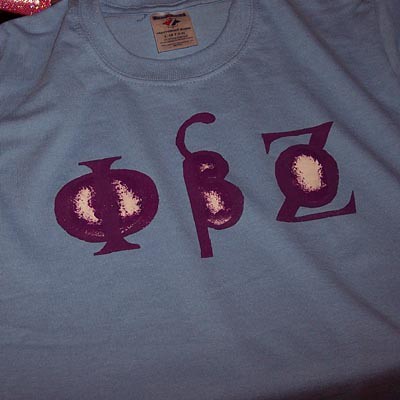
We named our co-op "Phi Bensa Zoe Academy" using our kids names to invent new and serious-sounding Greek letters. Then we invented the "new" Greek letters to go with, and that was the shirt. Whatever design you choose, print it out in black and white on a piece of paper. How complicated can it be? Depends how fussy you want to get with the cutting out and the ironing later.
2. Tape six pieces of freezer paper to a cutting board, and your design on top.
If you're making six shirts, use six pieces of freezer paper. Make sure the wax side is down!

3. Cut out your design.
Using the X-Acto knife, remove all pieces of your design. With a sharp knife or razor, you can easily go through seven layers of paper.
4. Make sure you save any inner pieces, because you'll need them later to complete thhe stencils.
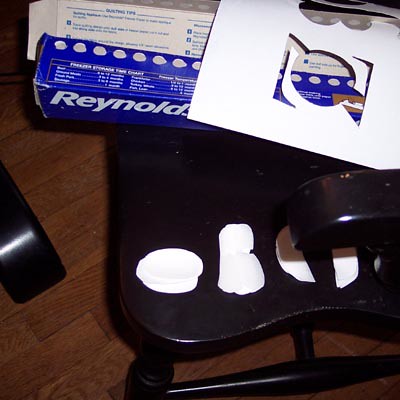
5. When the stencils are all cut out, remove them carefully from the cutting board and peel off all the tape that was sticking them down.
6. Lay one shirt on the ironing board and slide the piece of cardboard up inside it, under where you want the design to go. Iron the stencil on, wax side down, and make sure all little edges and bits are firmly ironed into place.
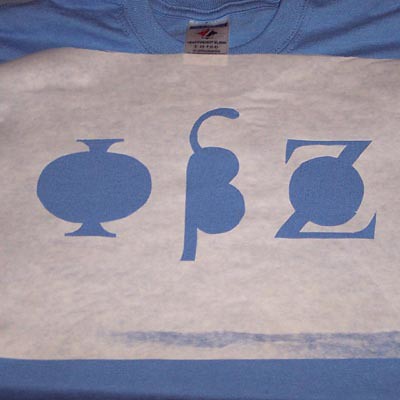
7. Now replace all the little inner bits and iron those down too.

8. Paint over the stencil, and make sure every bit of exposed fabric gets fully covered. This is pretty much the only part the kids can help with in anything but an advisory position. You don't have to glop on a whole lot of paint, but use a stiff brush and work the paint down into the fibers.
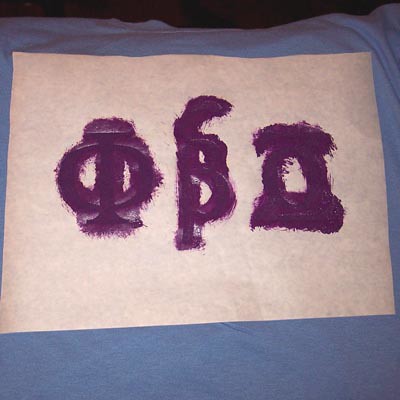
9. Peel up the stencil. Here, mine is peeled except for the inner bits.
10. Before washing this shirt, you should iron it to set the paint. Iron on the back, and put paper under the front so it doesn't get on your ironing board if it bleeds at all. Then you can wash it as usual!
Final product:
Is this your first time at my blog? Welcome! Hey, I have an idea! Come visit again! :)
My god! Thank you very much for creating this blog. I've been searching the net for this info for ages and now thanks to you i was able to make custom t shirts for me and my friends. Thanks alot
ReplyDeleteThank you so much for the help. I'm making t-shirts in my children's church class and this will be so much fun. I get to put our "class name" on the shirt, but the kids will do the "decorating". Thank you so much for showing me how to do "my part".
ReplyDeleteMolliej
The T-shirts look fabulous, great idea!
ReplyDeleteBuying supplies today, trying to make shirts next weekend at my daughter's birthday slumber party. I'll let you know how it turns out.
ReplyDeleteJust curious, how long til the paint washes out? Or is it permanant?
ReplyDeleteThanks for the information on how to make custom t-shirts. I've been wanting to make shirts for a bad movie group that I'm in.
ReplyDeleteI am heding up a team for a 5k and wanted to make shirts, this is a great idea. My team name will need to be much smaller since it's two words. I think I'll use my Cricut and cardstock to make the cut out instead of freezer paper. Thanks!
ReplyDeleteSweet...
ReplyDelete