Showing posts with label how to. Show all posts

Thursday, March 04, 2010

How to Get Your Child to Practice the Violin Without Sugar

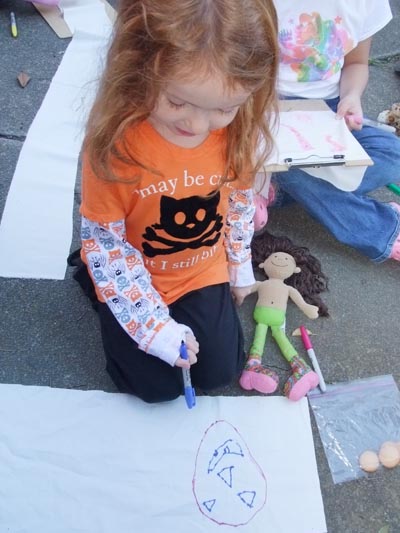
A reader of this blog asked me if I had any more good practicing tips, having found my doll concert post helpful in getting her five-year-old to practice. So here is another idea which can be adapted in many situations to make practicing more fun. And here's another picture of my baby playing the violin:


The general principle here is to make the practice a physical journey that the child can visualize and experience kinesthetically. Here are several ways to do that:

1. Create practice cards with location on them. Place them around the house (or outside!) with each card giving the next location. So hand the child a card that says "Bathroom, standing on the toilet." They go to the bathroom, climb on the toilet, and play their first song. There they find a card that says "In the doorway between the kitchen and the dining room." They go there, play their next song, and there they find a card that says "Hall closet." Or whatever. If Mom is traipsing along behind to help with position and pitch, you can't go wrong. After a few times of playing this, let the child be in charge of placing the cards before practice begins. You could even let the child make the cards, place the cards, and *you* be the one who has to find the next card and listen to a piece at each location.

2. If you have, like we have, a bunch of little toy houses and buildings, set up a little journey for a favorite toy or doll. The castle, the pirate ship, the beauty salon, Barbie's house, the treehouse... whatever you have for little destinations. Say, "Now, this Polly Pocket has to go to all of these places today and at each place she's going to hear a different piece of music. When she gets back to the beginning, practice is over." At each destination, the child plays another piece of her practice, and along the way, Polly Pocket can run into all kinds of problems: becoming extremely hungry, getting tired and wanting to give up, being chased by bears, being hounded by Paparazzi, etc. When Polly Pocket gets home, the practice is over: no exceptions! Polly is exhausted. If you need a more tangible variation, have Polly Pocket deliver marbles at each location, or pick up marbles from each destination.
3. A simple, portable version of this involves a little toy frog or bee and a piece of paper, and some tiny stickers. Draw ten (or however many) lily pads (or flowers), with the names of the songs on them... you can have multiple "Minuet 1" lily pads if that one needs to be repeated. When the frog has visited a lily pad, the child can put a sticker on it or color part of it in. There should be seven stickers on each lily pad (or seven petals of the flower colored in) at the end of the week, then the child can turn in the whole thing for a reward. Moving the frog around the paper lets them keep track of their progress and gives them a sense of what's coming up.

I'm sure you can think of lots of other variations on this theme, using the idea that a violin practice can be mobile, visible, tangible, and progress can be marked in space. Be as goofy as possible, and don't worry about "Well, this is working now, but what about next week?" Next week, if you need to, you'll think of something else. Maybe that thing will involve sugar. But most likely, once your child gets accustomed to practicing "with joy" because you're turning yourself inside out to make it fun, you won't need all the bells and whistles to get a good practice. Everything goes in cycles, I have found. If you get yourself through a rough patch by pulling out all the stops with fun games and adventures, you'll find yourself on the other side with a happier child and a new attitude.

Friday, October 23, 2009

Jungle Book Week 7: How to Make a Sari for a Doll


Namaste.

Today we got right down to business because we had so much fun stuff to do with our Sharpie Saris. However, in the academic track class, we made the time to take our Punjab region quiz:

Quiz: Which one of the following statements are true?

1. The word Punjab comes from the Latin and means “The Eleven Diapers.”
2. The Indus Valley Civilization is largely a mystery because we don't understand their writing.
3. When Aryan people migrated to India and practiced an early version of the Hindu religion, that was the Vedic Civilization.
4. The most important idea for Punjabi people is peace and harmony for all.
5. The Punjab has been invaded by a lot of civilizations, like Greeks, Mongols, and the British.
6. Sikhism is a religion that was started in the Punjab and is still practiced there today.
7. The British Empire was never able to conquer the Punjab region, so they finally gave up and went home.
8. The Punjab is now fully contained in the modern country of Pakistan. None of it is left as part of India.
9. Bhangra dance is a folk dance from the Punjab.
10. Punjabi is the language of the Punjab.

Project: Sharpie Saris

Materials:
Each child needs a doll or stuffed animal.
Sharpies in all colors. Blue and red spread the best -- the "old school" blue and red colors, not the newfangled ones. Of course, we had a rainbow of newfangled colors on hand too.
Stretch poplin cut to fit different sized dolls and animals. The fabric I chose had a small percentage of spandex in it -- this really helps with the pleating and tucking and wrapping. Each piece should be long enough to reach from armpit to floor, and long enough to go around five times. More if you're going to do pleats at the waist. Some of the girls did American Girl saris, and for these I used 44 inches of fabric, the full width of the fabric on the bolt. The width of the strip was about 10 inches. For a Groovy Girls size doll or a Webkinz, you need about half as much length, 2/3 as much width.
Safety pins for pinning the sari at the back.
Rubbing alcohol.
A squirt bottle or spray bottle, or an eye dropper. Fill this with the alcohol.

Instructions:
Find a place outside on the sidewalk or inside with lots of ventilation and a protected surface.
First, decorate your blank sari with the Sharpies. You can do whatever designs you like, but try using some of the motifs we learned about in class -- tear drops, half-moons, stars. You could even decorate your sari with mandalas like this:


Or you could do stripes like this:


Next, making sure you're on a protected surface or one you can ruin, spray the alcohol all over your design. The colors will start to bleed together:


When you've doused it with alcohol, let it dry. Running around waving it in the sunshine is a good way to execute this part of the plan!

When it's dry, wrap the sari on your doll according to the instructions on this video:


Now your doll has a sari:


Here are some pictures from our sari making!


For more pictures, visit our Jungle Book Flickr photo set.

Homework: Because we were upstairs, downstairs, outside, and all around, I'm not sure everyone got the Himalaya and Sannyasi fast facts, or if they got them, I'm not sure they made it into the folders. For this reason, and also because we have a special guest coming next week, we will push the quiz on the Himalayas to the following week. So, there is no quiz this week, there is no reading assignment for this week, and on Tuesday I will make sure everyone has the facts. Also on Tuesday, we will start the Mowgli stories! Hooray!

Saturday, July 25, 2009

The Jungle Wolf: A Story to Read Aloud


I'm writing this down as part of my curriculum, How to Teach Your Child to Write a Novel. This is a part of Lesson #3: Villains. "The Jungle Wolf" is a story my mother told me when I was little. I always imagined the red flower in the story to be Oswego Tea (or Bergamot) which is an exotic-looking red flower that grows in rare spots in the woods in Pennsylvania. Enjoy!

Once upon a time, in the middle of the woods, there was a brave little girl who lived with her mother in a small stone cottage. Every morning, when she went out to play, the mother told her, "My daughter, you can play in the front yard, and you can play in the back yard, and you can climb the trees, but DON'T go into the woods. Not even if you really, really want to! Because in the woods lives the Jungle Wolf! He has red eyes, and drooling jowls, and sharp fangs, and he eats little girls!"

And the little girl always did just what her mother told her because she wasn't the type of child to disobey her mother, and because she didn't want the Jungle Wolf to eat her up!

Now one day, the little girl was playing just at the edge of the yard, and she was staring into the woods, wondering what it would be like to go there, and see all the interesting things hidden there among the ferns and the tall trees. There in the woods, just out of her reach, she saw a beautiful red flower. It was so lovely, and so interesting, that she just had to pick it! So do you know what she did? She went right into the woods, that brave little girl, straight over to that flower, and she picked it.

When it was in her hand, she turned her head and had a look around. After all, this was her chance to see the woods and all the interesting things she'd dreamed she'd find there. Was she afraid of the Jungle Wolf? Not much! And do you know what she saw, just over there, just out of her reach?

Another red flower.

So do you know what she did? She went deeper into the woods, that brave little girl, straight over to that flower, and she picked it. And another, and another. And when she had a big bouquet of all the red flowers she had found, she looked around herself, and realized that she was very, very far away from home. And all around her the forest was still. And quiet. (whisper) And she could hear the ferns waving, and the trees growing. And she could hear (suddenly loud) GAHOGACHEE! GAHOGACHEE! GAHOGACHEE! It was the Jungle Wolf! And he was coming to eat her up!

The Jungle Wolf pounced on her, with his red eyes, and his drooly jowls, and his sharp fangs, and he said, "NOW I have you! And I am going to eat you up!"

The little girl said, "Oh, please, Mr. Jungle Wolf! Don't eat me! For if you let me go, I will stay right here and sing you a song!"

The Jungle Wolf let go of the little girl. He was very fond of songs. "Well alright," he said. "You can sing me a song, and I'll eat you right after that."

So the little girl began to sing: (in a sweet high sing-song voice) "Quee-Quiy-Quo-Quay, Quee-Quiy-Quo-Quay." And the Jungle Wolf began to get a little sleepy. (Pretend to get sleepy, and have the child join you in singing the song) "Quee-Quiy-Quo-Quay, Quee-Quiy-Quo-Quay." And then... he... was... asleep. Now the little girl stopped singing and began to creep, creep, creep away from the Jungle Wolf and back toward her house. Creep, creep, creep.... SNAP! She stepped on a twig and broke it!

(Then you repeat the last part, as many times as it's amusing to the child who's listening. The last time will end with the litle girl getting home.)

GAHOGACHEE! GAHOGACHEE! GAHOGACHEE! It was the Jungle Wolf! And he was coming to eat her up!

The Jungle Wolf pounced on her, with his red eyes, and his drooly jowls, and his sharp fangs, and he said, "NOW I have you! And I am going to eat you up!"

The little girl said, "Oh, please, Mr. Jungle Wolf! Don't eat me! For if you let me go, I will stay right here and sing you a song!"

The Jungle Wolf let go of the little girl. He was very fond of songs. "Well alright," he said. "You can sing me a song, and I'll eat you right after that."

So the little girl began to sing: (in a sweet high sing-song voice) "Quee-Quiy-Quo-Quay, Quee-Quiy-Quo-Quay." And the Jungle Wolf began to get a little sleepy. (Pretend to get sleepy, and have the child join you in singing the song) "Quee-Quiy-Quo-Quay, Quee-Quiy-Quo-Quay." And then... he... was... asleep. Now the little girl stopped singing and began to creep, creep, creep away from the Jungle Wolf and back toward her house. Creep, creep, creep.... SNAP! She stepped on a twig and broke it!

GAHOGACHEE! GAHOGACHEE! GAHOGACHEE! <> (bring your hands down hard on the table, or clap, or something). She leaped into the kitchen, and slammed the door, and was SAFE from the Jungle Wolf, who had to go back to the woods. And she never, ever, ever went out into the woods again by herself, no matter how many red flowers she could see from where she stood! The end.

Discussion:

1. What would the story be like without the Jungle Wolf? Can you retell the story without a villain?
2. What does the red flower symbolize for the girl? What does it represent?
3. Was the little girl right or wrong to go out of the yard and after the red flowers?

Sunday, June 14, 2009

How to Make Chess Team T-Shirts Using Fabric Spray Paint

For full instructions on this project, see my other blog post about making t-shirts here. I used the same general technique for making the chess team shirts but with some specific embellishments.


Materials:

Aerosol fabric paint. Something like this. In black.
White t-shirts.
A cardboard rectangle big enough to slide inside the shirts.
Xacto knife and cutting board.
Freezer paper.
Iron
Iron-on letters (optional)

1. Find or draw your design. You are looking for a simple silhouette of a chess piece. You can use whichever piece is your team's favorite. We used kings because our coach refers to the kids as King Benny, King Ben, etc. Maybe you want to be knights or even pawns. You know, the pawns are the most powerful pieces on the board. Or something. Look for something very simple in silhouette, like this:


2. Print out your design at about 10 inches high.
3. With an Exacto knife and cutting board, cut the design out of freezer paper. Save the inside! If you need a visual on this process, check my other post.
4. You now have two pieces of freezer paper -- one in the shape of a chess piece (to make the white king) and one with a chess piece shaped hole in it (to make the black king).


5. Position the freezer paper with a chess shaped hole in it in the spot you want the black king, and iron it down.
6. Slide your cardboard piece up inside your t-shirt to protect it from seeping paint. Spray your fabric paint into the stencil. Spray LIGHTLY! This is not a job for kids. Back up about a foot from the shirt and spray in gentle bursts. If you spray too close or too heavily, it will get clumpy and gluey and will not dry properly. Ever. As long as you live. Even if you live to be 37, like I have.
7. Let it dry for a few minutes and then peel the freezer paper outline off. You now have a black king!
8. Position the king-shaped freezer paper where you want the white king. and iron it down.
9. Spray your fabric paint around this reverse stencil. This is supposed to look a little graffiti, a little rock-and-roll, so spray in a zig-zag and let your inner tagger out. You do have an inner tagger, don't you? You didn't poison your inner tagger with too many violin lessons and tae kwon do tournaments did you? Good. So tag away.
10. Let it dry for a while and then peel the freezer paper off. You are done!

You can also add letters, iron-on jewels, and other embellishment. Go mad. The beauty of custom t-shirts lies in the creative potential; you can put anything you want on them and have a lot of fun doing it, so go nuts! Chess is a battlefield, and you may need to employ all the iron-on weapons in your arsenal. More pictures:


On the kids' shirts, I put the black king on the back.


Father and son shirts. Yes, this is their game face.


Chess shirts in action at the Championship Chess Norfolk tournament in May.


Benny's concentration pose.


The Benjamins


The Brocketts


Chess warriors

Thursday, January 08, 2009

Bee Season: Three Spelling Study Tips

Looking for spelling games? New ways to study? Gearing up for that big local homeschool spelling bee? Trying to figure out how to pronounce the schwa sound without giving away the vowel?

We are too. Here are three things we've been using to help us get ready:


1. Spelling City. This is the best spelling web site I have seen, and it's free. You can enter your own list, manage multiple lists, and edit them as needed. There are three levels of interaction: Teach me (the child hears the word spoken and sees the word spelled), Test Me (the child clicks a "say it" button, listens to the word, and then spells it in a blank field), and Play Games. The games on Spelling City are much much better than those on any other site I've found. They're big, bright, interesting, and actually reinforce the spelling of the words. After the child takes the test, he/she can retake it with only those words they missed. Another cool feature of Spelling City is that you can print out handwriting practice sheets with your words in cursive or printing, even including words the software doesn't "know" like gopak or raj.


2. Spelling Stairs. This game is particularly good for active kids who have trouble sitting still to practice spelling. Not that I know anyone like that. No, no, my children sit perfectly still and look expectantly at me, waiting to be told what to do. This is just fun for us, not at all a method of keeping my hair rooted in my head. Anyway, the child starts at the bottom of the stairs. With each word he gets correct, he leaps wildly up to the next step. With each word he gets incorrect, he drops back to the next lower step. At the top of the step he gets... something. A cookie, or a sticker or a bead to put on a string, or whatever bribing device you use. You could say "You have to get to the top of the stairs five times before you can go outside to play" or something like that. Benny loves this game and while we're playing it I do not have to tell him not to tap his toe, not to rock in his chair, not to chew on his collar, etc.


3. Spelling Stumps. This game is best played in the car, in line at the post office, or shouted up the stairs last thing at night. The idea is that you try and stump the other person as you're both trying to think of spelling words without looking at the list. I say a word, Benny spells it and then Benny gives me a word, I spell it and give him a word back. Any hesitation, saying "Ummm..." or scratching your head in bemusement results in the other player gaining a point. This game tends to focus on problem words because those are the words that you most clearly remember. Benny always goes straight for "adamant" and at this point I know he will never forget how to spell that word.

I hope these help you like they've helped us! Do you have any tips for me? I'd love to add some more games and methods to our a-r-s-e-n-a-l.

Saturday, December 13, 2008

How to Make a Sweater from Scratch

First, purchase six skeins of a yarn that's cursed with the insidious, unbearable, name "Softee." Purchase it because it is $2/skein at Michael's. Think, "I will make a prayer shawl out of this." Any chunky yarn will actually do. It doesn't have to have a title that makes you want to hack off your head with a rusty saw.


Cast on 62 stitches on size 9 needles. Begin knitting a ribbed pattern, knit 2 purl 2 etc, for ten rows.

Begin faux cabling, using a very fancy sneaky non-cabley cable recipe that you learned by creepily staring at Colyn while she was knitting. If you don't know Colyn, you can spookily leer at any knitter who's doing a stitch you admire. If they look at you suspiciously, compliment their glasses. That always works.

Cable for a while.

You should at some point in the first 30 rows gasp and realize that due to the scrunched-upness of the cabling and ribbing, this prayer shawl will be only wide enough to wrap up some kind of sad terrier.

Despair.

Decide that what it really was all along was the front of a sweater for your four-year-old daughter.

Rejoice!

After you've knit until the bottom of the sweater comes to your daughter's hips when the top of the sweater is at her armpits, cast off 5 on both sides and switch to your second color.

Continue until the top of the white is at your daughter's neck when the bottom is at her armpit, then cast off all but three repeats of the cabling thingy, and continue making a little asymmetrical tab thingy on *one side of the sweater only.*

Make a duplicate for the back. Now when you put these two things together, the little tab thingy will be on opposite sides, will form a shoulder, and you can stitch them together. See, this is the shape:


After you've got two of those thingies and you've put them together at the sides and shoulder, it's time to start panicking about the sleeves. Make a complicated plan. Confuse yourself. Live for days in inner turmoil.

This is a good time to hang out with some experienced and intelligent knitters. You might want to clutch at your head periodically and loudly say, "I DON'T KNOW WHAT I'M GOING TO DO ABOUT THESE SLEEVES! MY MY!" Hopefully someone will stop you from knitting and tearing out mysteriously shaped sleeve pieces which you intend to set in, and say, "Just pick up the stitches around the arm hole." In my case it was Deva.

Pick up the stitches around the armhole on size 6 double pointed needles. Celebrate! Rejoice! For me it was about 40 stitches. Continue knitting stockinette in the round until when you put the garment on your daughter she says it is almost the right length. Then switch to ribbing for 10 rows.

Do the other sleeve.

Put the sweater on your daughter. She will say that it needs something. Something like pink flowers.

Decide that pink flowers can be stapled onto the front of the sweater like an afterthought. Crochet some little flowers in a similar yarn. Sew them onto the front of the sweater with the flower color yarn -- I recommend sewing down all the petals.

Now pick up the stitches around the neck and knit some ribbing until your daughter proclaims "IT'S CHOKING ME!" Tear out a couple of rows, and cast off.

You're done!


Disclaimer: I am an idiot who has no idea how to make a sweater. I was helped along by extremely generous and smart knitters who saved me from making stupid mistakes. Your mileage may vary!

Wednesday, August 20, 2008

How to Make a Duct Tape Hat

Want to learn to make an awesome, waterproof, colorful, duct tape hat, using two rolls of duct tape and nothing else!? Welcome! This project is part of the Vote for Me! Elections Unit Study hosted here at Little Blue School. All the lucky people who are attending the political conventions are going to be wearing those crazy, ridiculous, fashionable hats, so I decided to get us in the mood with duct tape hats. My dear friend Lori, adored playmate of my childhood, brought her kids over today to play. They are also homeschoolers! Naturally, I roped them into some hatmaking, particularly Eden, who is 11 and handy with the duct tape.

Here's our result:


So, how did we get there?

Materials:
Duct tape in many colors. We used Duck brand which comes in purple, orange, blue, red, chrome, pink, aqua, yellow, and other silly choices. I used approximately two rolls per hat. Some rolls have more on them than others. I had no problem getting a whole hat out of two small rolls, with leftovers.
Scissors you don't care too much about. They will get sticky.

I can think of a million variations to this hat, but here are directions for my hat, my method:

1. Build the Brim Square. First, you build a square from which to cut the brim.


Lay down a piece of tape, about 18 inches long, sticky side up.
Next tear off another piece of the same length. Lay it on the first piece, sticky side down, staggered halfway up.
Now you have two pieces of tape stuck together, with half the sticky side exposed on each side.
Turn the piece over to expose the sticky part of the tape you just added.
Stick another piece on, same length, sticky side down, over that one.
Continue until you have a square.

By laying each piece of tape exactly over the other, arranging these two-sided strips next to each other, and then laying another layer of tape perpendicular to the first layer, to join them, you can create a stronger piece. Like I said, there are other ways, but this was my way.

2. Cut the Head Hole. When you have built a square, cut a circle out from the middle of it.


You'll need a circle that will allow your head to go into it, but be careful of making it too loose. Duct tape is actually pretty stretchy. To get a circle, fold your square in half and then cut a quarter circle away from the center point, then unfold. If you start with a 3.25 inch quarter circle, you will probably be in the right neighborhood. Big math points to older students for figuring all this out exactly. Fit it onto your head to make sure it will go:


3. Create the Crown Rectangle. Now it's time to make the crown. Figure out how high you want your hat to be. I did about 12 inch strips. Your vertical strips will be joined together in exactly the same manner that you joined strips to build the brim. If you want stripes, alternate colors -- two blue (one in the front, turn, one in the back) then two red (one in the front, turn, one in the back)

Here's me making the striped crown of Sadie's pink-and-chrome hat:


4. Join the Crown Tube. When the crown has been built up to a length that will wrap around your head and fit approximately into the hole you made in your brim, finish it by joining the two ends together.

Here I am with the "stovepipe" part of the hat, measuring it against the hole in the brim, while Dan explains something about trading to me:


Here's Eden measuring her crown against her brim, checking to see if she needs to add more strips:


5. Cut the Tabs. Now cut slits in the bottom of the crown, about two inches long, all around the bottom of it. These will become tabs that attach to the brim. This is best illustrated in a picture I took of Eden making her hat:


6. Connect Brim to Crown. When you have your tabs cut, tear as many 3 inch strips of tape as you have tabs, and stick them to something closeby, like a table edge or your leg, so they'll be handy. Start by taping down one tab, then do the tab opposite, then the tabs between, and work your way around. So, do the north tab first, then the south tab, then east and west, etc. This will keep your project even. It's a good idea to try on during this process so you can gather it in or stretch it out a bit, as needed. Tape all your tabs down firmly. If at any point the hat becomes too big, create a gather and tape it down. If it is too small, cut the crown apart, add more tape, tape it back together, and you will *never know* there was a problem. Duct tape is awesome!


7. Attach the Top. The only thing left is to make the very top of the hat. If you still have the piece you cut out of the brim, you can use that to finish the top, or you can create a new piece using the same strip-on-strip method, and cut it into a circle. It's not necessary to make it perfect at first cut, you can trim it to fit later, after you tape it in. Attach it with tape strips inside the crown where it won't show:


8. Embellish. Now you can trim the brim into whatever shape you like. Zig-zag, circle, scallops, or whatever. You can cut out embellishments and tape them on, add a hat band, flowers, whatever you like. We added stars on this hat to turn it from this:


To this:


Eden rolled her brim to create a cowboy-hat-like effect:


That's it! There are more pictures in my Flickr Set but I can't resist posting a few more here. Any questions, please email me. If you do this project, I would love to see the results! Stay tuned for more Vote for Me materials, and happy campaigning!

Benny's hat:


Jordan's hat:


Cameron's hat:


Happy Homeschoolers:


Is this your first time at Little Blue School? Welcome to the blog! I hope you'll stick around and visit some of my other posts for more homeschooling ideas, projects, songs, and crafts. If you found this page helpful, would you bookmark it on your favorite social bookmarking site? Thanks!