Showing posts with label sewing. Show all posts

Monday, October 20, 2008

Patchwork Vest and Pants

This is the three inch strip project. Most of it was made with three inch strips.

My friend Kristen asked me months ago if I would make a vest and pants for her son Rhys to wear in a wedding. I said, "Of course!" because I love Kristen and adore Rhys and I especially like making great clothes for little boys. I used to make clothes for children, for my own and others, and also sold them occasionally. I don't sell them anymore but I do make skirts for Sadie and me and I make other things here and there, and have made things for Kristen and her kids before too. So, no big deal.

Except that... when it got down to it, I was very intimidated by the project. I had not made any "special occasion" garments in the past, nor had I sewed something on purpose that I knew was going to be scruitinized to this degree. Kristen sews, and her mom sews, in fact her mom really really sews, and knowing that these expert types would be looking at the seams (albeit in a dear, sweet, kind, approving way) kind of blocked me up. When the box of fabric arrived for me to use, I looked at it fondly and thought, "Somebody should certainly make a vest and pants out of that. I wonder if anyone will?"

On Friday I pulled out my patterns and started thinking, and made a couple of quilt blocks. On Saturday I made those quilt blocks into the outside of a vest. On Sunday I did the lining of the vest, the pants, the pants lining, and put it all together with some decorative stitching on top. Everything has pockets. Everything has a million colors. I hope the poor child survives this experience with his equilibrium. Not everyone could make this outfit work, but Rhys is definitely the child to manage it, if such a child exists.

Front of the vest:


Back of the vest:


Pants:


Everything on Sadie:


Sadie is at least a whole size too small for it, so that's why it looks like she's swimming in it. I just wanted to see it on an actual child. But I'm sure Kristen will take pictures! ;D

It's in the mail for Thursday. I did not sew up the opening on the elastic casing, in case adjustments need to be made. I made it to a 25 inch waist, but without a fitting I'm nervous about the size. If you need to make it smaller, and you have time, pull out the elastic until you find the seam, fold it smaller, resew it, chop off the excess, stitch up the opening. If you don't have any time, you can just pin it tighter with a safety pin, or tear out the seam and repin it looser with a safety pin, then just leave the opening open and no one will ever know. With the pants -- they're steamed with a double cuff at the hem to be 16 1/2 inch inseam. If you need them longer, refold, resteam, you could even tack it up or even ideally create a little dart with a button. I was nervous to tack it up or put a button there because I couldn't check the length on the actual child. If you have no time, just roll them up and go with it. :) The fabric with two layers is stiff enough to hold the cuff.

Whew! Done!

Edited to add:


Wednesday, August 20, 2008

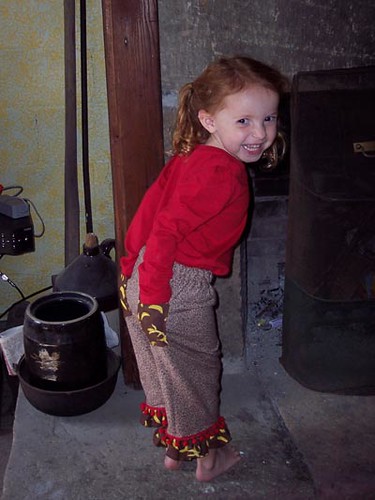
Sock Monkey Pants

Hi! I warned you about sock monkey pants, did I not?


I will blog the elections class materials this afternoon. We are doing the "Funny Hats at the Convention" project today with some other kids that are coming over, and I want to include pictures and whatever variations we come up with. So that lesson will be available tonight.

For now: SOCK MONKEY PANTS!

Thursday, January 03, 2008

Lookit the Pink! It's the Pinkiest!


I made this outfit for my friend's daughter Maisy for her birthday last year. Thus the cakes on the skirt. The jacket is not made from real poodle -- don't worry! No dogs were hurt in the construction of this outfit, except for my dog whenever he approached the project with his inevitable feet. Today I got these sweet pictures of Maisy modelling her pink outfit. Very gratifying. Very awesome!


Monday, August 20, 2007

How to Make Princess Dolls

This should properly be titled, "How to Make Princess Dolls with 20 Children Under the Age of 7 Without Running Screaming into the Night."
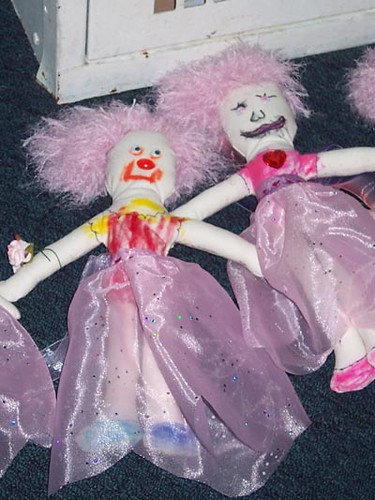

And if anyone feels the need to remind me that I did run screaming into the night a few times, recall that at least I remembered my address and took my keys with me.

Materials:

A reasonable amount of plain muslin.
Pale colored thread.
A Sharpie!
Yarn for hair. We used a very silly, fluffy fun-fur type.
A sewing machine.
Some loverly pink organza.
Different loverly pink ribbons, 2 inches wide, cut about 15 inches long.
Jewels.
Googley eyes.
Non-permanent markers for the kids.
Tacky Glue. Small bottles the kids can manage.
Skinny ribbons, cut about 10 inches long.
Tiny bunches of pink roses on floral wire. We found 10 in a bunch for just a few dollars. Just cut apart the bunch and remove the floral tape and they'll be useable individually.
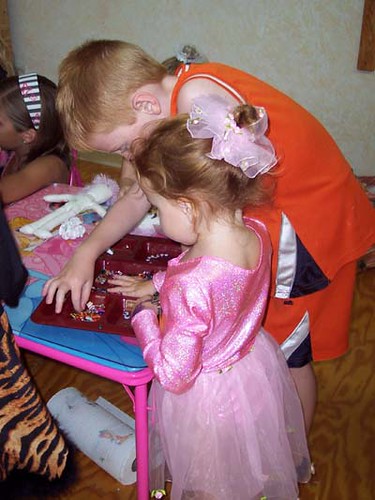

Making the Doll

1. Draw a template. The doll should be about 10-12 inches high, with a nice big
round head, and fairly thin, long arms and legs. Give yourself enough room to
turn and stuff the doll, but we don't want a fat baby ballerina here, we want a
nice long stringy ballerina. Our arms and legs were about an inch, an inch and a
half wide. It's nice to add a thumb sticking up and shape the foot so there's a
shoe.

2. Trace the template onto muslin with your Sharpie. It's good to sew one up and make sure you like it before you trace 20 of them.

3. Cut the dolls apart from each other. Don't worry about cutting too close to the sewing line -- just separate the dolls from each other. It's easier to sew if you have more room.

4. Set your sewing machine to a very small stitch length and sew around on the
Sharpie line. Leave a small hole for turning under one arm. About an inch and a
half will work.

5. Now trim the excess fabric down to very very close to the stitching line. Clip your curves, turn, and stuff

6. Finally, use a Sharpie to draw a leotard and shoes onto the doll. Do different necklines, different sleeve shapes and hems, etc, on the different dolls. Make the leotard one of those ones with legs that go halfway down to your knees.


Making the Hair

1. Make yourself a cardboard hair-winder. If you want short hair, the
cardboard hair-winder should be about 4 inches wide. For longer hair, go up to 6
inches.

2. Wind the hair around the hair-winder until you have a reasonable amount
of hair for a doll.

3. Slide the loop of hair off the cardboard and lay it on a scrap of
muslin. The more interesting and delightful your yarn is, the more irritating
and painful it will be to make the hair. Soft slippery fluffy hair is going to
give you a pain in your bum that feels like the bite of a horse.

4. Sew it down to the muslin, making sure that it doesn't spread out more
than a few inches. As you go down the hair, keep smooshing it under the pressure
foot, smooshing, and smooshing. The stitches you're sewing will separate the
bangs from the rest of the hair, so if you're making long hair, put your
stitches toward one end.

5. Turn the muslin-and-yarn wig over and trim the muslin down very close to
the stitching line.

6. Lay the wig on the doll and sew it on by hand. While you're doing your
handwork, you can stitch up the hole in the doll that you used to turn her and
stuff her. If you have any "gotcher armpit" jokes in you, now is the time to use
them.

7. Turn the doll upside down over a garbage can and clip open the loops of
hair. You're over a garbage can to stop the fluffs of hair from invading every
corner of your home. For this reason, take your scissors with you and go
outside, before you give her a good shake and then a nice haircut/trim to shape
up her hairdo.

8. After doing this hair, it's a good idea to clean out your sewing machine
a bit.

Making the Skirt

1. To make 21 skirts, I folded 1 yard of organza into thirds (12 inches
wide, 44 inches high) and cut the thirds into 7 pieces each (approximately
12 inches wide, 6 inches high). You could make them wider (more that 12 inches)
for more gather, or longer (more than 6 inches) if you have a longer doll.

2. Increase your stitch length all the way long and stitch down the top of
each skirt. Pull on the bobbin thread and gather the skirt up.

3. Cut your wide ribbon into pieces approximately 15 inches long. Fold the
center of the ribbon over the center of the skirt and sew into place so the
ribbon is wrapped over the gathered up part. I used a decorative stitch for this
-- hearts, flowers, you know the drill.

4. Now the skirt is done. If you're making more you can fancy it up with a
hem, or stitch the entire ribbon closed, or something, but if you're making a
lot, and you finish this part, give yourself a pat on the back and maybe a nice
big mug of rum. Or diet Coke.


Putting it All Together.

Now it's the kids' turn to take over. There are two ways to put this project together. I suggest the kit method for a smaller number of kids, the station method for a larger number.

The Kit Method
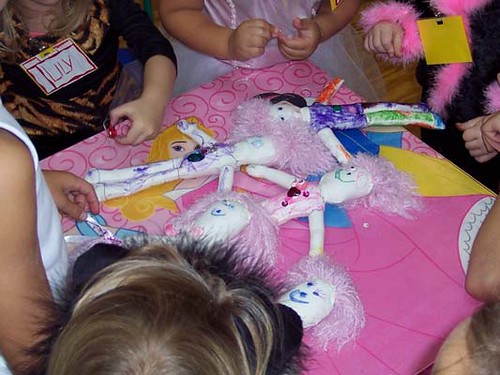


Into your large ziploc baggie goes 1 doll, 1 skirt, 2 googley eyes, a
handful of jewels, a skinny ribbon, and a rose. The child sits down at a table
with a communal marker bin.

1. First, she colors the face and leotard using markers. Non-permanent
markers are fine, because we're not going to be throwing this doll in the
washing machine, are we?

2. Next, she glues jewels onto the doll's body. Maybe emeralds around the
neckline. Maybe a giant sparkly heart right in the middle of the bodice.
Maybe diamonds in the hairline. A pearl on each shoe. Try not to glue
anything right around the waist where the skirt will tie on. Show the kids how
to do one dot of glue for each jewel, rather than splodging around a whole lot
of glue.

3. Tie on the skirt. Older children will be able to manage sticking jewels
onto the skirt too, but it's tricky, because the glue bleeds through the
organza.

4. Now tie the skinny ribbon around her neck in a bow, and clasp her hands
together and wrap the little rose around them, using the wire. If the child
doesn't want the hands clasped, you can just wrap the rose around one hand, like
a wrist corsage.

5. Allow glue under jewels to totally dry before the doll begins her career
as a toy.
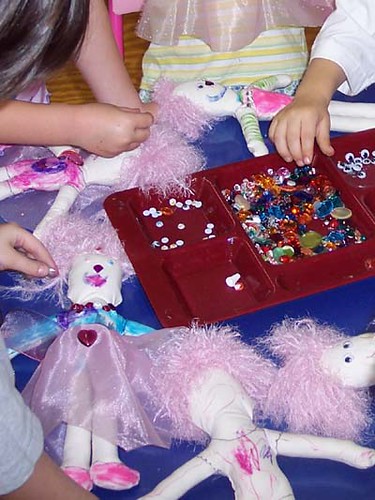


The Station Method

1. The Marker Station. Give each child just the doll and have her sit down
at a table with a communal marker bin and color the leotard, shoes, and
face.

2. The Sparkle Station. Put the jewels and googley eyes out in trays and
have an adult (or two or three) standing by to administer the glue as directed
by each child who comes to the station. You do the glue, the kid arranges the
jewels, the eyes, as they desire.

3. The Skirt Station. Pick out a skirt and tie it on the doll.

4. The Finishing Station. Tie the skinny ribbon around her neck and wrap a
flower around her wrist.
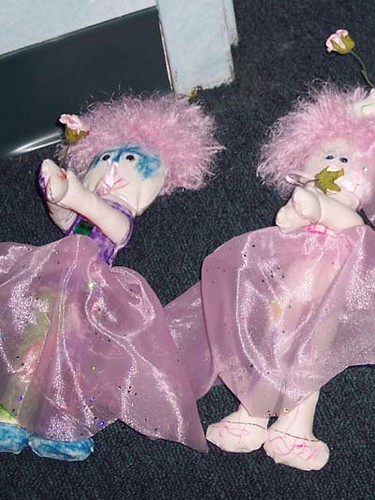


Done! Let the pretending begin!

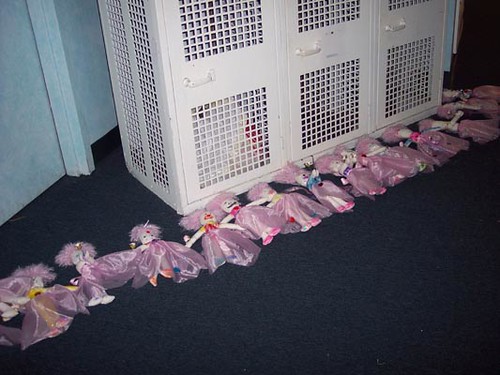
Thank you to Ahno who fought with that lousy muslin and that slippery pink hair, on and on into the night, and emerged triumphant. We prepped these projects for 20 children at ballet camp, and thanks to the cooperation of the teachers and volunteers, we had 20 happy children bouncing off with their own personal doll at the end of the day.

Sunday, April 08, 2007

We Have Achieved Easter

Longsuffering husband and I went to bed at 1am, after hiding all the colored eggs around the house, along with the little presents the bunny was going to bring to the kids this year. Between 1 and 7, when I finally dragged myself out of bed, Benny woke me up 4 times to let me know that the bunny had visited but that he was going to wait until morning to hunt the eggs, and Sadie woke me up 3 times to go potty.

It was a supergreat night. I absolutely loved last night. I particularly loved the third time that Sadie said, "MOMMY! I WEED TO GO POTTY!" and I came back with, "Sadie, you just went potty. You cannot have to go potty." She began to volubly sob and wail, saying, "I DO TOO WEED TO GO POTTY AND MY TEE-TEE IS COMING WIGHT NOW." I guiltily sat her on the toilet to see if she actually did. Well, she did. Guess I was wrong. Or delirious. At 6am I heard someone stumping down the stairs, and I rolled out of bed and staggered out into the hall to tell Benny that if he didn't go to bed immediately I was going to throw all the Easter eggs into the furnace and give whatever toys the bunny had delivered away to the undeserving children down the street, who were at least ASLEEP and therefore MY FAVORITE children on earth.

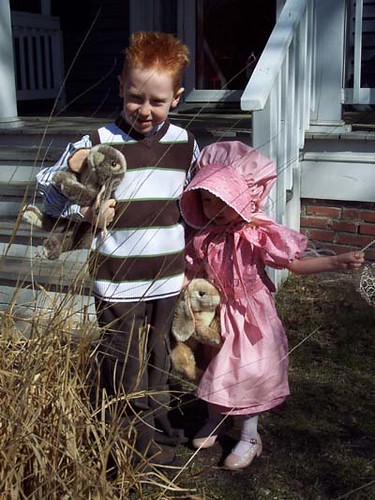
It was not Benny. It was no one. Or maybe it was my sanity, stumbling away into the night. What matters is that I finished the colonial Easter dress last night and here it is:


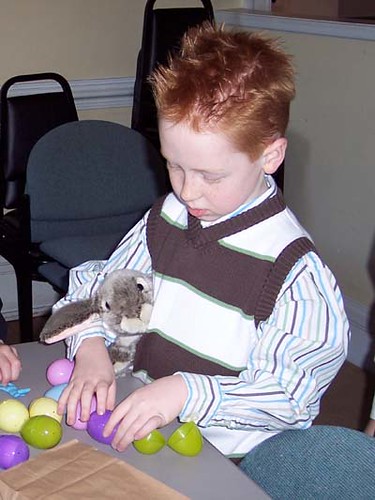
The children at Christ and St. Lukes this morning were treated to a rich experience. First they got to march in the procession at the beginning of church with the trumpets and the organ and everyone singing, "Christ the Lord is Risen Today." That was exciting. Then they had an easter egg hunt and sat and listened to the Easter story being told on story cards they could take home with them to retell it at home. Then they got to go and stand right behind the clergy by the altar during an Easter baptism of three little babies, before joining their parents for the rest of the service.

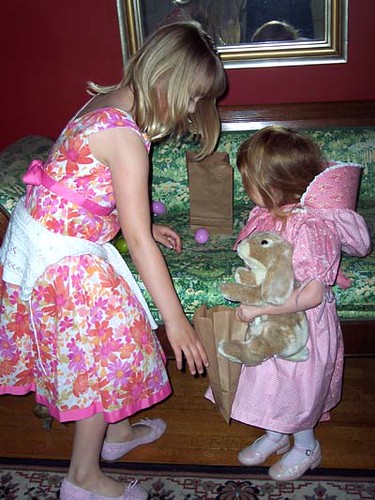
Here's Sadie getting some help with her egg hunt:


Here's Benny sorting out his loot:


No one puts together a more meaningful and engaging church experience for children than the experts at Christ and St. Lukes. I am constantly amazed.

This afternoon I'd like to take a nap, but I need to do my prep work for the Phi Bensa Zoe Academy that launched last week. What's the Phi Bensa Zoe Academy? I'll blog about that tomorrow...

Saturday, April 07, 2007

Spandex and Colonial Times

In the course of parenting a lively child who is richly engaged with the world around her, you find you have to sew things. Difficult things. Spandex things.

Sadie loves her leotards. She wants to wear one every day. When she's wearing some other vile outfit that doesn't qualify as a leotard, she says, with great pathos, "But MOMMY, now I not a ballewina!" Trying to convince her that being a ballewina starts in the heart and not in the closet is... not effective. She really thinks it starts in the closet.

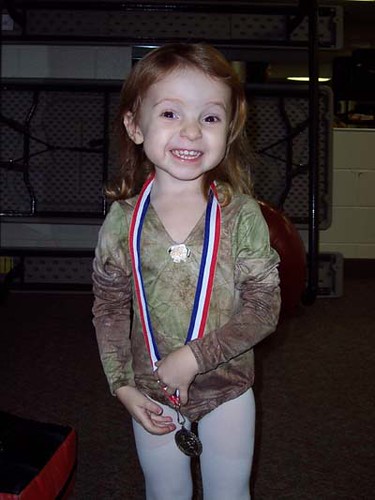
When she first started ballet, I bought her one leotard. Insufficient! I bought a second leotard! Also insufficient! So I dragged my sorry carcass to Hancock fabrics and approached the aisle I'd never explored before -- the lycra and spandex aisle. The aisle of the lovely leotards. I told Sadie she could pick out her own leotard fabric, and she (predictably) chose the pink. I chose some other fabric too, kind of a mottled green/gold. Here's the one I made in my fabric:


Not appropriate for ballet (pink only!) but she wears it to gymnastics.

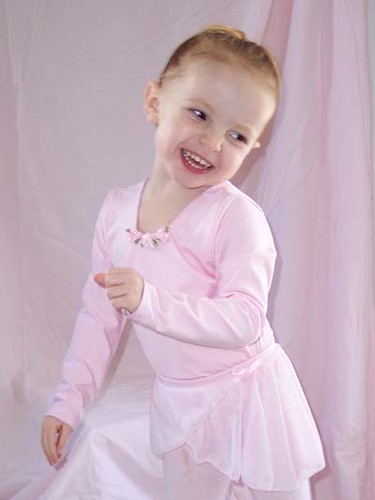
Here's the one I made from her fabric:


I actually made two of each fabric, both identical, so now she has six total, and she doesn't seem to run out as fast. Whew. Nice sewing, mom. But, let's be honest. Do you notice what both of these leotards (and by extension the others that I made) have in common? Little flowers at the neck? Yes, I explained that to myself by saying I intended to use those flowers, to make the pink leotard more like Kelly's leotard in "Barbie and the Nutcracker." In fact, I must admit, those flowers are there to hide the hideous gapping and puckering that happened when I was doing the neckline. And let's not even pretend that these leotards fit her. They are baggy in all the wrong places. Meaning all the places. As a leotard-ist, I have fallen short of the mark.

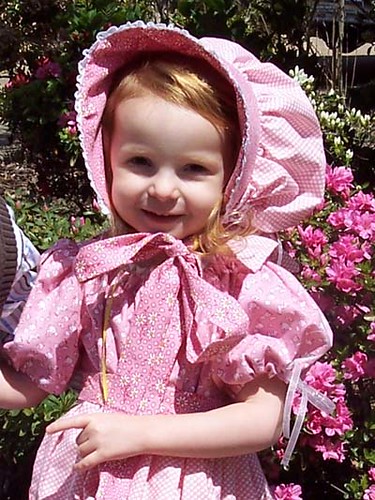
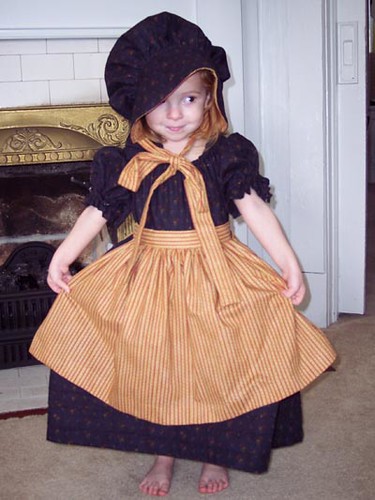
Now I have another chance to test my sewing skills. Ahno made Sadie this dress and bonnet to wear to Colonial Williamsburg:


Awesome, right? I was so in love with the overall effect, and Sadie was so charmed with it too, that I borrowed the pattern and vowed to do the same style in all pink for her Easter dress.

Here we are on Easter Eve! I am not Ahno. I cannot do this shearing and keep it straight. I cannot do this gathering and keep it even. Yet, having set my task before me, I cannot at this hour run to Nordstrom and buy something respectable. I have to persevere. I'm sitting here with the dress done (sort of), the apron in pieces and the hat only a dull throb in my head.

Tune in tomorrow to see if I managed it...

Saturday, January 06, 2007

McDonald's Bear

Benny did his first sewing project this week, with a real needle that is sharp and everything, holding it in his hand where it could have at any moment flown wildly into the air and punctured his skull. And I didn't have a panic attack!

I decided I needed to make a Teddy bear. This is something I haven't tried before, and I thought it would be fun for the kids and I to do this together.
First, I let the kids pick out the fabric. The fabric they chose is something *only* children would pick -- it has McDonald's logos and Ronald McDonald's face all over it in a bright red and yellow repeating pattern. It hardens your arteries just looking at it. Wow. If I were to make a bear using only my own asthetic choices... I would certainly have chosen something different. But hey.
Next, I found a pattern on the internet, and printed it out, enlarged it via eyeballing it, and drew it onto cardboard. Then I cut it out with my own gnarled arthritic fingers. I modified it a tiny bit -- added a gusset to the middle of the head, and changed the arm shape a little. The pattern I chose was the simplest one I could find.
The kids helped me lay out the pattern on the fabric, figure out how many pieces to cut, and trace it onto the fabric with a Sharpie. Then I cut it out. I wish I could have relinquished the scissors on this step but... sometimes you have to take a *little* control or they'll be sad with the final product with has radically different arms, no legs, and a hole in its stomach.
Benny helped run the sewing machine -- he does the foot pedal and I yell STOP! GO! SLOW! NO STOP! NO GO! and somehow we got the pieces together. Then I clipped the curves and they helped me turn and stuff it.
This was an exciting moment for them, because they could really visualize the end product. Benny really really wanted to sew with the real needle and thread and be in charge of closing up the openings. So I let him do one leg and one arm while I did the rest. It was so completely darling watching him bite his lip, wrinkle his forehead, and earnestly sew:

He also tried to do the head attachment, since I think he interpreted this as the most significant part (and it is!) but after wrestling with it for a while, he asked me to do it. After we were done, and before I sewed on the button eyes and embroidered the nose, I went upstairs to get Sadie dressed. As I was coming down the stairs, Benny reported cheerfully, "WELL! He's all decorated!" He had used the green Sharpie to draw on eyes, nose, claws, mouth, and a big giant S on his belly, with a green border.
I gulped down my "WHAT HAVE YOU DONE" and said, "What's the S for? Is it Superbear?"
"No," he said, "It's for Sadie. I made this bear for Sadie to have. That S tells her it's hers."
Well. Okay. So you can draw on your bear with a green Sharpie any time. And if you want to make it out of ridiculous McDonald's fabric, that's okay too. Just keep being such a sweetheart, and everything will be fine by me.